Monday, December 31, 2007

Breakfast Serial


I will be "going-on" about breakfast for at least one more blog entry, so just brace yourselves.

If you don't have the family collection of recipes as compiled by my dad, then you need to get one. This is John's Favorite Angel Biscuits, as passed down by my paternal grandmother. I remember these from my childhood on visits to her house, and also our own, since my dad makes these often. He has added his own thumbprint for the future with his manipulation of the dough into cinnamon rolls. Sean ape-loves these and claims I have never made them for him before. He may be right, but I have meant to. You can see him snatching one in the picture as I am taking it. This dough is pretty fast, and makes a decent amount although it can be doubled. As is, the recipe can be divided into about 10 biscuits and 12ish cinnamon rolls; but, alas, that makes one have to choose which to eat first.

Tip: Biscuit dough gets tougher each time you roll it out. I roll mine out once, cut it into squares with a knife and dodge the biscuit cutter altogether. That way I don't waste any dough and don't have to roll it but once, ever.

John's Favorite Angel Biscuits (cinn rolls to follow below)

2 1/2-3 c flour
1 t salt
1/2 t soda
1/2 t baking powder
1/2 c shortening
1 c buttermilk
1 pkg yeast
1/3 c warm water

Mix yeast and warm water, stir, and set aside to proof for about 8 minutes. Combine dry ingredients and cut in shortening. Add buttermilk and yeasty water and mix. Knead dough a few times and roll out, cut and place biscuits (not touching) on a cookie sheet. Bake at 425 for about 12 minutes or until golden brown. Yield: about 2 dozen for single batch.

You can use half of the above dough for 12ish cinnamon rolls; just divide the dough before rolling, as the biscuits need 3/4 inch thickness, and the rolls need about 1/4 thick.

Cinnamon Rolls

Roll out the dough to 1/4 inch thick into a rectangle shape. Spread this with melted butter and sprinkle with combined 1/2 cup sugar and 1 t cinnamon. Add chopped nuts if you like. Roll up jelly-roll style and cut with a serrated knife into 3/4 inch slices. Bake 425 for about 12 minutes. Glaze with powdered sugar mixed with a scant drop of vanilla and a bit of milk.

I'm also including another recipe for biscuits that we love. They are absolutely the easiest and fastest biscuit to make, and the only one I had success with at first.

Quick Cream Biscuits
(makes eight 2 1/2 inch biscuits)

Bake these immediately after cutting to maximize the leavening potential.

2 c all purpose flour
2 t sugar
1 t baking powder
1/2 t salt
1 1/2 c heavy cream

Heat oven to 425 and adjust rack to upper-middle position. Line baking sheet with parchment.

Whisk together all the dry ingredients in a bowl. Add 1 1/4 c cream and stir with a wooden spoon until dough forms, about 30 seconds. Transfer dough to a floured countertop, leaving all dry bits in the bowl. Add 1 T of cream to bowl to moisten the dry bits, repeating until all are moistened; add these bits to the rest of the dough. Knead by hand for 30 seconds just until smooth.

Shape the dough into a round, 3/4 inch thick. Cut into rounds or wedges, and place on the baking sheet. Bake till golden brown, about 15 minutes, rotating pan halfway through.

Sunday, December 30, 2007

An Ounce of Pretention...


It was definitely time for another Pretentious Salad. For those who do not like arugula, you can substitute with baby romaine or something insipid of your own choice. But this one is made for arugula. I happen to love my basic salad dressing, so if I do this one again, I would swap the dressing for mine.

Also, we would sub the cheese, as Sean hates bleu cheeses. He has a reason, though. We were in San Francisco for one day only and were stuck in the hotel for dinner. KK absolutely has to have tons of greens as often as possible, so he got me one in the hotel restaurant with our other food. We split the salad, which had bleu cheese crumbles on it, but only I kept it down. Sean offered it back to the San Francisco sewage system in several installments throughout the night.

This salad brought it all back to him.

Well, it didn't bring it all OUT of him, but now bleu cheese chunks remind him of,... well, chunks of bleu cheese. I thought it was delightful (the salad, not the episode). We used Point Reyes, another bleu styled cheese, and roasted and salted pecan halves. The recipe is from Cooks Illustrated.

Arugula Salad with Grapes, Fennel, Gorgonzola, and Pecans

some Arugula
some Grapes (red seedless, sliced in half)
some Fennel (sliced thin)
some Gorgonzola (crumbled)
some Pecans (halved or chopped, roasted)

OK, I just hate the way some recipe titles have all you need to know and then proceed to tell you again.

Dressing:
4 t apricot jam
3 T white wine vinegar
3 T olive oil
1 small shallot, minced extra fine

Whisk these with a 1/4 t salt and pepper in a large bowl. Toss fennel (thinly sliced) wit the vinaigrette and let stand 15 minutes. Add the arugula, grapes (halved), and chopped fennel fronds; toss and adjust seasonings. Divide among salad plates and top with pecan halves and crumbled gorgonzola.

Friday, December 28, 2007

@#$^$@#^^! (butternut squash!)


Butternut squash can be a swear word in itself. While you peel it, you often think of swear words, and why not "butternut squash!"? Types of cheeses can also be good swear words, especially when you really, really need one and children are present. "GorgonZOLA!" Try it, parents.

The Butternut Squash Risotto is a butternut squash's highest calling, but if you want something easier, and still squashy, try this one from our Practical Cookery: Soups book again. It originally called for Pumpkin, but Sean hates pumpkin. It was actually a bit spicy last night, which is helping with his cold remnant.


Pum... er... Butternut Squash Soup

2 lb pumpkin or squash
3 T butter (please don't use margarine. ever. for anything.)
1 onion, sliced thinly
1 garlic clove, crushed
2 cans veggie stock (unless you're out, like me, and used chicken stock instead)
1/2 t ground ginger
1 T lemon juice
3-4 thinly pared strips of orange rind (optional, but very nice)
(note: make sure the strips are big enough to keep track of)
1-2 bay leaves, or a bouquet garni
1 1/4 c milk (approximate)
salt and pepper
Garnish: light or heavy cream, unsweetened yogurt or sour cream, snipped chives)

Peel the squash, discard seeds and brains, then cut into 1 inch cubes. Melt the butter in a large heavy saucepan and add the onion and garlic. Cook over low heat till soft. Add the pumpkin and toss with the onion for 2-3 minutes.

Add the stock and bring to a boil over medium heat. Season with salt and pepper and add the ginger, lemon juice, orange peel strips and bay leaves. Cover and simmer over low heat for about 20 minutes, until the squash is tender.

Discard the orange peel and bay leaves. Cook slightly and process in something whirry, like a blender, or food processor. I use a stick blender for my own safety, and all serious soup makers should have one of these. If you don't have one, ask for one for Christmas. Return the pureed soup to the stove and add the milk, reheating gently. Adjust the seasoning, then serve in warmed bowls, garnish with the white goop of your choice and chopped chives. We don't support chives in our kitchen, so the picture shows chopped fresh sage.

Thursday, December 27, 2007

Soup: It's What's For's Dinner('s)


(Extra apostrophi especially for Watoosa. )

Come on! What is easier than soup? Well, falling down, for one. And the common cold! Oh! Oh!... and also slipping in the bathtub! Anyway, soup is usually easy for dinner if you gots ya chop on. (There is plenty of chopping to do.) We have this cookbook called Practical Cookery: Soups that we use alot. The editor of the book is not listed, thank goodness, or I would have written and complained. They list all kinds of mistakes like "Pumpkin Soup..... page 140" when it is really on page 201. Not even close! They also sometimes switch up the pictures of the soups. I've written corrections all over this book, but still it just keeps on givin'. There's some yum in there. Their pictures are really fantastic looking, while mine.... well, look at the one for today's soup. Not the most attractive, but you've got to take my word for how it tastes.

Some are especially good when you have a cold, like Indian Potato and Pea....

Indian Potato and Pea
(serves 4 small, 3 average, or 2 really hungry people)

2 T vegetable oil
8 oz mealy potatoes, diced
1 large onion, chopped
2 garlic cloves
1 t garam masala
1 t ground coriander
1 t ground cumin
2 cans vegetable stock
1 red chili, chopped (pick your damage, or use red pepper flakes)
1 c frozen English peas
2 T unsweetened yogurt
salt and pepper
cilantro, chopped

Heat the oil in a large saucepan. Add the potatoes, onion and garlic and saute over medium heat, stirring constantly, about 5 minutes. Add the garam masala, coriander and cumin, and cook, stirring constantly, for 1 minute.

Stir in the stock and chili and bring mixture to a boil. Reduce the heat, cover the pan and simmer for 20 minutes, until the potatoes begin to break down. Add the peas and cook another 5 minutes. Stir in the yogurt and season with salt and pepper. Garnish each bowl with as much cilantro as you can stand; serve with warm bread.

Friday, December 21, 2007

Oh, the Chocolate of It All!


Again, a fussy recipe, but SOOOOOOOO worth it! If you feel like an extra special cake, and you like dark chocolate, and have a partner to clean up the kitchen afterwards, this is the cake for you. A previous winner at the Hall Christmas Family Gathering, it has been tested on other audiences by my sister, Li'l Kathryn and her co-workers. We've changed the cocoa to Special Dark Cocoa, since we are dark chocolate lovers. I'll update the pictures once I've cut into it (it is for a party this evening). I want to capture the cream cheese cakey layer in the middle! First I will go hose down my kitchen (cocoa accident).

Personal note: This is the most beautiful chocolate cake I have ever made. My cakes taste good, but rarely look good. I'm actually taking this one public.

Source: my xerox copy, which comes from some cookbook that also cites it from Our Best Home Cooking from the Citizens of Zion Missionary Baptist Church Women's Ministry in Compton, California.

Fudge Pecan Ripple Layer Cake

Cake:
1/2 c shortening (I will experiment with butter next time)
1 1/2 c sugar
2 large eggs
1 2/3 c all-purpose flour
2/3 c cocoa (Special Dark cocoa makes it special. And dark.)
1 1/2 t baking soda
1/2 t salt
1 1/2 c buttermilk
4 t vanilla, divided

Ripple Part:
8 oz cream cheese, softened
2 T butter, softened
1 T cornstarch
14 oz can sweetened condensed milk
1 large egg

Frosting:
2/3 c butter, softened
5 3/4 c sifted powdered sugar (sift first, then measure)
1 1/3 c cocoa (again, Special, and Dark)
1 c plus 2 T whipping cream OR 3/4 c milk
3/4 c chopped pecans, toasted

Grease 2 round cakepans (9 inch), line bottoms with wax paper or parchment, then grease the wax paper. Toss a couple of tablespoons of cocoa to dust the inside of each pan. Set aside.

Beat shortening at medium speed with an electric mixer until fluffy; gradually add 1 1/2 c sugar, beating well. Add 2 eggs, blending after each egg.

Combine flour, cocoa, soda and salt. Add to the shortening mixture, alternating with buttermilk, beginning and ending with flour mixture. Mix at low speed after each addition until well blended. Beat 3 more minutes on high speed, stopping once to scrape down the sides and bottom of the mixing bowl. Pour into prepared pans and set aside.

Ripple layer: Beat cream cheese, 2 T butter and cornstarch at medium speed until creamy; gradually add sweetened condensed milk, beating well. Add 1 egg; beat well. Stir in 1 t vanilla. Spoon this mixture evenly over chocolate batter in pans.

Bake at 350 degrees for 40 minutes or until a tester inserted in center comes our clean. Cool in pans 10 minutes, then remove onto wire racks to cool completely.

Wash up your mixing bowl and beaters (ANNOYING PART)

Frosting: Beat 2/3 c softened butter at medium speed until creamy. Combine powdered sugar and 1 1/3 c cocoa; add to butter alternately with the cream or milk (note different amounts depending on which liquid you choose). Beat until spreading consistency. Stir in remaining 1 t vanilla. Spread frosting between layers and on top and sides. Sprinkle with toasted pecans.

Butternut Squash Risotto


Some things are just worth the fuss. This risotto takes awhile to make, but you won't be disappointed. The recipe makes 4 main course servings (or 6 first courses), so we eat it for 2 days. You don't really want to overindulge with this one, as rice expands, and I'm sure there are several comic drawings of humans who ingest too much rice. Save yourselves. Have a pretentious salad afterwards.

This recipe is from Cook's Illustrated, so you know there will be some fussy steps. I will try to minimize them as I can. However, this version is light on the stirring.

Butternut Squash Risotto

2 T olive oil
1 medium butternut squash (about 2 lbs)
3/4 t salt (divided)
3/4 t pepper (divided)
4 c low-sodium chicken broth
1 c water
4 T unsalted butter
2 small onions (or one large sweet one)
2 medium garlic cloves
2 c arborio rice
1 1/2 c dry white wine
1 1/2 oz. grated Parmesan cheese (or Piave)
2 T minced fresh sage leaves
1/4 t grated nutmeg (so important!)

First, get your chop on. Finely chop the onion and set aside in a bowl. You should have around 1 1/2 cups. Mince the garlic or press it though a press and add it to the onion bowl (around 2 t. garlic). In that same onion bowl, throw in 1/2 t salt and 1/2 t finely ground pepper. Set aside. Pick up that squash and peel it. Slice it in half, separating the bulbous part from the straight part (you'll know what I mean). Cut the bulbous part in half and scrape out the seeds and membranes. Save the guts in a small bowl. Dice the rest of the squash in 1/2 inch pieces. You can put this squash stash in a medium bowl which you will use again.

Heat oil in a nonstick skilled over medium high heat until shimmering. Add about 3 1/2 c of the diced squash in an even layer and cook without stirring for 4-5 minutes, until golden brown. Stir in 1/4 t salt and 1/4 t pepper and continue to cook, stirring occasionally until squash is tender and browned (about 5-8 minutes longer). Cook it till you want to eat it (some of this will not be cooked any further). Transfer to the bowl you first put it in and stick it somewhere it will stay warm-ish.

WARNING: You could leave some of this next step out if you want.

Start bringing your chicken stock and water to a boil in a large saucepan. (keep that part) Return the skillet to medium heat and add the squash guts and any leftover diced squash to the pan. Cook, stirring frequently, until lightly browned, about 4 minutes or so. Transfer this to the saucepan of chicken stock, bring it to a full boil, then reduce it to simmer, covered, until you're ready.

Melt 3 T butter in the now empty skillet over medium heat; when foam subsides, cook the bowl of onion stuff, stirring occasionally until soft, about 4-6 minutes. Add the rice to the pan and stir frequently until the grains are translucent on the edges, about 3 minutes. Add wine, stir frequently, until fully absorbed, 4-5 minutes.

Meanwhile, strain the hot broth (see, I told you, you might want to skip the guts addition from earlier) and return the broth back to the pan to keep simmering. PERSONAL NOTE: I do the guts thing, but strain the liquid as I pour it in the risotto through a little strainer. Discard the solids.

When wine is fully absorbed, add 3 cups hot broth and half of reserved squash to the rice. Simmer, stirring every 3-4 minutes, until liquid is absorbed and bottom of pan is almost dry (about 12 minutes). Meanwhile, get your sage leaves chopped, grate your nutmeg if you wish, and grate the cheese.

Stir in about 1/2 c hot broth and cook, stirring constantly, until absorbed, about 3 minutes. Repeat with additional broth 2-3 more times until rice is al dente. Off heat, stir in remaining 1 T. butter, cheese, sage and nutmeg; gently fold in remaining cooked squash. Use any remaining hot broth to loosen the texture. Serve immediately.

Thursday, December 20, 2007

C is for Cookie


I've tried hard to press Sean into saying what his favorite cookie is. Last year, I tried to find his preferred sugar cookie. After 3 or 4 tries, I gave up. From now on, I'll be baking MY favorite sugar cookie recipe.
So now we think Sean's favorite cookies are Molasses Spice Cookies. I made them this week and they are absolutely perfect with a cup of ginger tea. This recipe is from Cook's Illustrated, and I made the variation with orange essence, so that is the version I'll include below. If you have something against oranges, just leave out all the zest. I have to say, these cookies are a tiny bit fussy to make but I am always surprised how much I like them each time we bake them. Especially with the orange zest.

Tip: Measure out molasses in a liquid measuring cup that has been sprayed with cooking spray or greased with butter. It slides right out. Or, if you have one of those gunk tubes from Pampered Chef, you don't have to spray it, just punch it out.

Molasses Spice Cookies with Orange Essence

1/3 c granulated sugar, plus 2/3 c for dipping
2 1/4 c unbleached, all-purpose flour
1 t baking soda
1 1/2 t ground cinnamon
1 1/2 t ground ginger
1/2 t ground cloves
1/4 t ground allspice
1/4 t finely ground black pepper
1/4 t salt
12 T butter (1 1/2 sticks), softened but cool
1/3 c packed dark brown sugar
1 egg yolk
1 t vanilla extract
1/2 c light or dark molasses
2 large oranges

Adjust oven rack to middle position and heat to 375 degrees. Line 2 baking sheets with parchment.

Zest the oranges until you have 3 t of zest. Place 2/3 c white sugar in a food processor with 1 t of the zest, and whir until pale orange, about 10 seconds. Store this on a plate or cake pan to use later.

Whisk flour with all dry ingredients (spices, soda, salt) in a medium bowl until combined; set aside.

In standing mixer bowl with paddle attachment, beat butter with the 1/3 c white sugar, 1/3 c brown sugar and the remaining 2 t. of orange zest until light and fluffy, about 3 minutes on medium-high. Add yolk and vanilla (stop or reduce speed to as not to wear these two ingredients), and beat until incorporated, about 20 seconds. Add molasses at lower speed and beat till mixed, about 20 seconds, scraping the bowl sides and bottom once. On lowest speed, add the dry ingredients and beat about 30 seconds, scraping the bowl once. Finish the dough with a few strokes by hand to assure no flour pockets. The dough will be soft.

Using a tablespoon measure, scoop heaping balls of dough and roll into 1 1/2 inch balls. Drop balls into the plate of orange-ified sugar from earlier. It helps to do about 4 at a time, then toss in sugar to coat and set on the baking sheet. (The more sugar you can force on that dough, the snowier the finished cookie will look.) Space about 2 inches apart. When you have a sheet full, bake in oven (one sheet at a time) for about 11 minutes, rotating halfway through, until browned, still puffy, and edges have begun to set but centers are still soft (cookies will look raw between cracks and seem underdone). Do not over bake.

Cool cookies on the baking sheet for 5 minutes, then transfer to a wire rack to cool. These keep for about 5 days (if not eaten, of course) in a sealed plastic bag.

Thursday, December 13, 2007

Snowbound Food


This is what we ate........................... This is where we ate it.

We just got back from a short vacation outside of Denver in the Arapahoe National Forest. The cabin was just down the road from Apex, a former mining community near Black Hawk, Colorado. I believe just before we arrived on Sunday, they had two days of heavy snow (heavy for Texas, anyway), so there was about 2 feet of snow on the ground. We have no snow gear, so we went for the ambience. But we will go back in warmer weather to enjoy more fully.

When we vacation, we don't eat Hamburger Helper (no offense to those that do). We rig what we like to eat according to the kitchen capability of our rental establishment. This place had raunchy knives, but we still managed to eat really well.

We stopped at a pretentious grocery store in Denver to gather supplies and pick up our wine (no alcohol sales on Sunday, so we phoned in an order on Saturday and paid for it in advance). Of the three wines: the Dolcetto was the least interesting and not worth repeating, the southern Italian red was awesome (60% Negroamaro, 40% Primitivo, 100% yum), and the Pinot Grigio was delightful (Santi Apostoli, 2006).

What better for cold weather than soup? Nothing, I say. We love this Lemon and Chicken Soup and usually double it for lots of leftovers. I don't think it offends any eating category, so it should be safe for kids if you cut things up small enough. We, of course, modify it, and I'll note the changes from the original recipe, which originates from Practical Cookery- Soups from Dempsey Parr. They call it a summer soup, but I think it deserves the whole calendar.

Note the pasta shape below. I like using mini pasta shapes instead of spaghetti, but the pasta really soaks up the broth, so you'll need more that the recipe calls for. Also if you reheat this, you'll need more broth since the pasta continues to absorb the liquid during storage. You can prepare the soup right up to the pasta addition in advance; just reheat it when you're ready and then add the pasta.

There is also a lemon zest option to the recipe. The original recipe says to thinly pare the lemon zest in strips, then blanch in boiling water, then chop finely. This is bogus and tedious. I use a microplane and zest it before juicing the lemons, skip the boiling altogether, and add it in the soup. If lemon scares you, just don't use all the zest. I'm so confident you need to avoid the original method that I won't even include it below.

Lemon and Chicken Soup

Servings: 4, Prep time: 10-15 min, Cook time: 1.25 hr

4 T butter
8 shallots, thinly sliced (I use 4, but Beth, feel free to use 8)
2 carrots, thinly sliced
2 celery stalks, thinly sliced
8 oz. boned chicken breasts, finely chopped
3 lemons
5 c. chicken stock (you really need more)
8 oz. dried spaghetti, broken in pieces, or other small shaped pasta
5/8 c heavy cream (I have never used the cream, ever, EVER)
parsley, for garnish

Get all your 'thinly sliced' action done first. Start with the shallots, then carrots and celery, and end with the chicken. Then get rid of that cutting board so you won't contaminate anything else.
Melt the butter in a large saucepan. Add everything you just thinly sliced (veggies plus chicken) and cook over low heat, stirring occasionally, about 8 minutes or more until chicken is cooked through, and veggies are soft. Meanwhile, zest the lemons and then juice them.

Add the lemon zest and juice to the saucepan, as well as the chicken stock. Bring slowly to a boil over low heat, then simmer for 40 minutes. Find something useful or productive to do in the meantime, like open a nice Pinot Grigio or Sauvignon Blanc and start a movie.

Add the pasta to the pan and cook for 15 minutes. Season to taste with salt and pepper (freshly ground, of course) and add the cream (if using, although I suggest not to). Heat through but don't boil if you added cream; it will curdle, but serves you right for using the cream in the first place.

Pour into warmed serving bowls and garnish with parsley.

Friday, December 7, 2007

Fall Food


Bless me, www, for I have sinned; it has been six weeks since my last blog. Forgive!

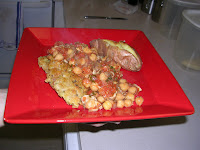
This picture really doesn't do this justice. We were watching a cooking show on PBS (we don't have cable, really), and Jacques Pepin was making this. Sean really wanted to do it, and I thought, "Sure, I'll go along, but I don't want to make that stewy sauce." The sauce is the best part! I make it often and put it on just about everything. It is really good on toast, on other meats, and also grains like quinoa (my favorite grain; it is the most palatable of all health foods). This picture shows it in the original combination of pounded and breaded pork tenderloin medallions.
We made this for my extended family on Thanksgiving day, since they had rescheduled Thanksgiving for Friday this year. Some of you know how picky my Grandfather is. I do believe with my whole heart he is the most spoiled, pickiest eater older than 2 years. Everyone makes special versions of food just for him to avoid conflict. For this meal, Granny actually picked out the mushrooms of his portion in advance because he vehemently detests them. Family and friends, I want the internet community to note, I got an A+ from my Grandfather for this meal!

We had been cooking all day for the Friday gathering (which I would miss comletely, and I am still jonesing for some dressing!), and I said Sean and I would fix dinner for the family that night. We made this dish and everyone, EVERYONE, loved it. Even Sophie at three bites of meat! Granddaddy actually had seconds from the main pot with mushrooms and didn't even notice!

This meal can be made with lots of canned goods, so it is super convenient. The mushrooms were my addition because I absolutely love them. Leave them out, Chris, if you like. Oh, and have a salad after; go European! We usually make this for two people, but that night was seven and a half people, so just plan your tenderloin appropriately. The sauce can, and should be, doubled for leftovers.

Breadcrumb note: Please learn to make your own breadcrumbs. It is so easy if you have a food processor; we even use that little mini prep one. Take about 3-4 slices of bread and cut it into large pieces. Use just about any kind of bread; sandwich bread, pagnotta, or even herb bread and skip the extra herbs. We usually add some herbs to the processor, too, when we didn't have herb bread. It's not necessary, but very tasty. Whir it around till it looks like fluffy snow, then dredge your meat. I cannot advocate the crumbs in a cardboard container. If you are processorless, grate the bread on a cheese grater. If that proves unwieldy, try freezing the bread first.

Pounded Pork with Stewy Sauce

egg noodles, if using
1 T. butter, plus another 2 T. for frying
pork tenderloin, cut into 2 inch medallions
some flour, like 3-4 T.
Fresh breadcrumbs (in your food processor, not a cardboard can)
one egg, beaten
1/2 sweet onion, diced or slivered
15 oz. can garbanzo beans, rinsed
15 oz. can diced tomatoes (or chop up canned whole tomatoes)
15 oz. can chicken broth, low sodium
mushrooms, sliced, as much as you want
fresh tarragon, chopped, or other herb

Saute the sweet onion and some oil in a medium sauce pan on medium heat until soft. Add the rinsed garbanzos, tomatoes, chicken broth and mushrooms, if using (and I do suggest using). Bring to a boil and reduce to simmer while you prepare the meat.

If using egg noodles (so simple and yummy), start boiling a large pot of unsalted water. You should add them just as you start cooking the meat (about) so they will be just finished as you serve everything.

Pound the tenderloin medallions to 1/4 inch or so with a mallet or heavy flat saucepan. Salt and pepper the pieces. Heat a nonstick skillet to medium. Place three plates on your counter, one for each dredging ingredient (breadcrumbs, egg and flour). , Dredge each piece of pork first in the flour, then the egg and finally in the crumbs. (If you are trimming calories, just use the flour; the sauce will make it yummy later.) Heat a bit of oil in the pan and just before adding the meat, add 1-2 T. butter (real butter) to the pan. Fry each piece until browned, flip over and do it again.

Noodles can be tossed with 1 T. butter. Add chopped tarragon to the sauce. Place the pork on top of the noodles, then the sauce.

Light reds work well with this, as do some whites. Try a Beaujolais Nouveau, out right now for a limited time and rather inexpensive. We love Pinot Noir with this.